
At first, I thought this was going to be the easiest part because I assumed the gown was going to be of the same construction techniques as the fitted dresses (aka gothic fitted dress, cotehardie, kirtles, or whatever else someone thinks they should be properly named) for the 1350s-1400s, for which I have a pattern and have made several gowns for myself. However, I notice in looking at the portraits closer, I realized that while similar, the kirtle of the 1450s-1500s is not really the same dress.
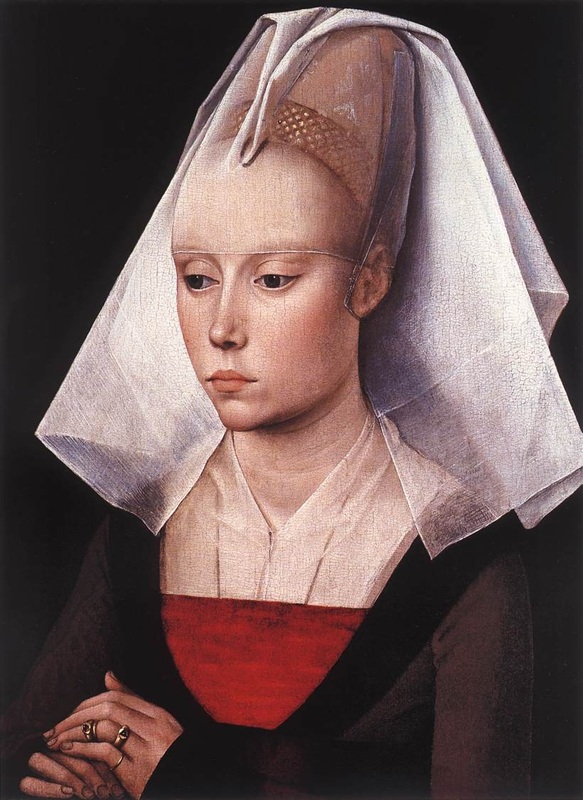
The new kirtle has short sleeves instead of long; the neckline is squared or V shaped, instead of curved; the body could have a seam at the waist or the 4 panel construction, instead of only the 4 paneled construction; and had lacing rings instead of eyelets. Each of these various present new problems between how to construct the gown and which version I choose to go with.
To start of with the lacing, I really wanted to have lacing rings. However, I have yet to find lacing rings sufficiently small and strong enough to withstand the force and strain of my lacing. I have purchased some that are closed rings, but they break (I should say explode) with the first test yank and others I have found made from 10 gage contort shape with the pulling. Then I got the bright idea of going to the local hardware store and picked up some #8S brass washers, reasonably priced for $0.98 for a packet of 10 to use in place of the lacing rings.
The only issue with these are insides of the washers can be a bit sharp, and eventually saw through the lacing cord causing a wardrobe malfunction. Therefore, filing them to smooth the insides will be needed. I’m still working out the best way to do this.
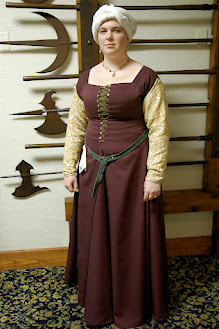
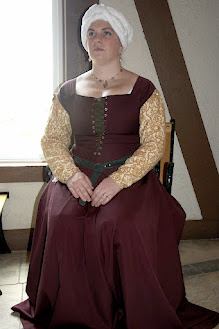
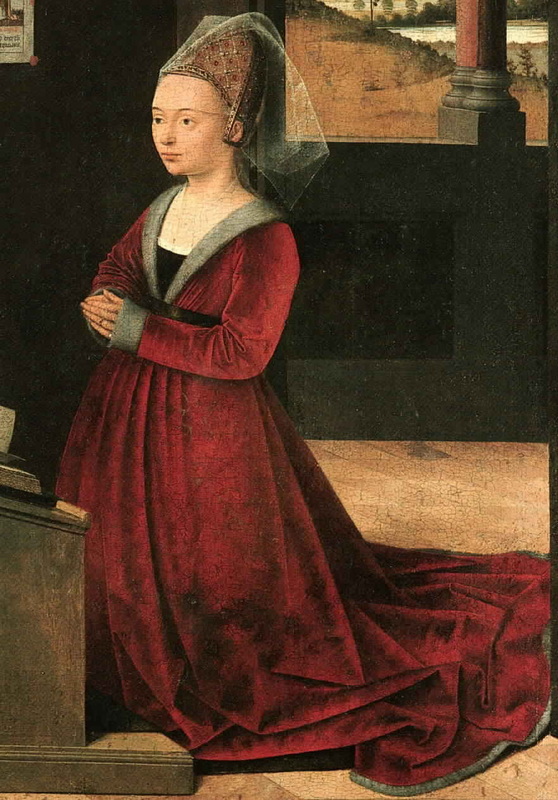
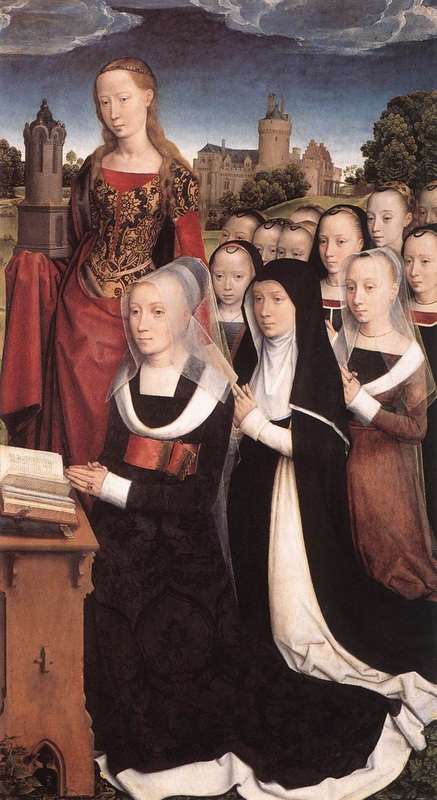
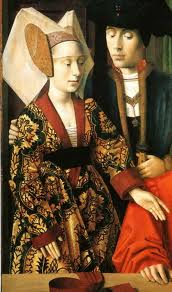
As far as the shape, I have ultimately decided on going with a kirtle style of those shown below and that are similar to that of my fitted dresses, but with differing sleeve construction and ensuring a straight front. (My fitted dresses curve in the front for the bust)
The new kirtle has short sleeves instead of long; the neckline is squared or V shaped, instead of curved; the body could have a seam at the waist or the 4 panel construction, instead of only the 4 paneled construction; and had lacing rings instead of eyelets. Each of these various present new problems between how to construct the gown and which version I choose to go with.
To start of with the lacing, I really wanted to have lacing rings. However, I have yet to find lacing rings sufficiently small and strong enough to withstand the force and strain of my lacing. I have purchased some that are closed rings, but they break (I should say explode) with the first test yank and others I have found made from 10 gage contort shape with the pulling. Then I got the bright idea of going to the local hardware store and picked up some #8S brass washers, reasonably priced for $0.98 for a packet of 10 to use in place of the lacing rings.
The only issue with these are insides of the washers can be a bit sharp, and eventually saw through the lacing cord causing a wardrobe malfunction. Therefore, filing them to smooth the insides will be needed. I’m still working out the best way to do this.
As far as the shape, I have ultimately decided on going with a kirtle style of those shown below and that are similar to that of my fitted dresses, but with differing sleeve construction and ensuring a straight front. (My fitted dresses curve in the front for the bust)
I drafted a rough idea of how the pattern should look, and then enlisted a friend’s help to fit the pattern. Below are pictures of my pattern pieces. Since the kirtle has short sleeves, I was sure to have my friend mark the length and ensure its evenness, rather than just hacking off a chunk of sleeve. An important note is that the sleeve seam appears to go under the arm rather than along the back like the fitted dress. This makes sense, especially with the sleeve construction variation.
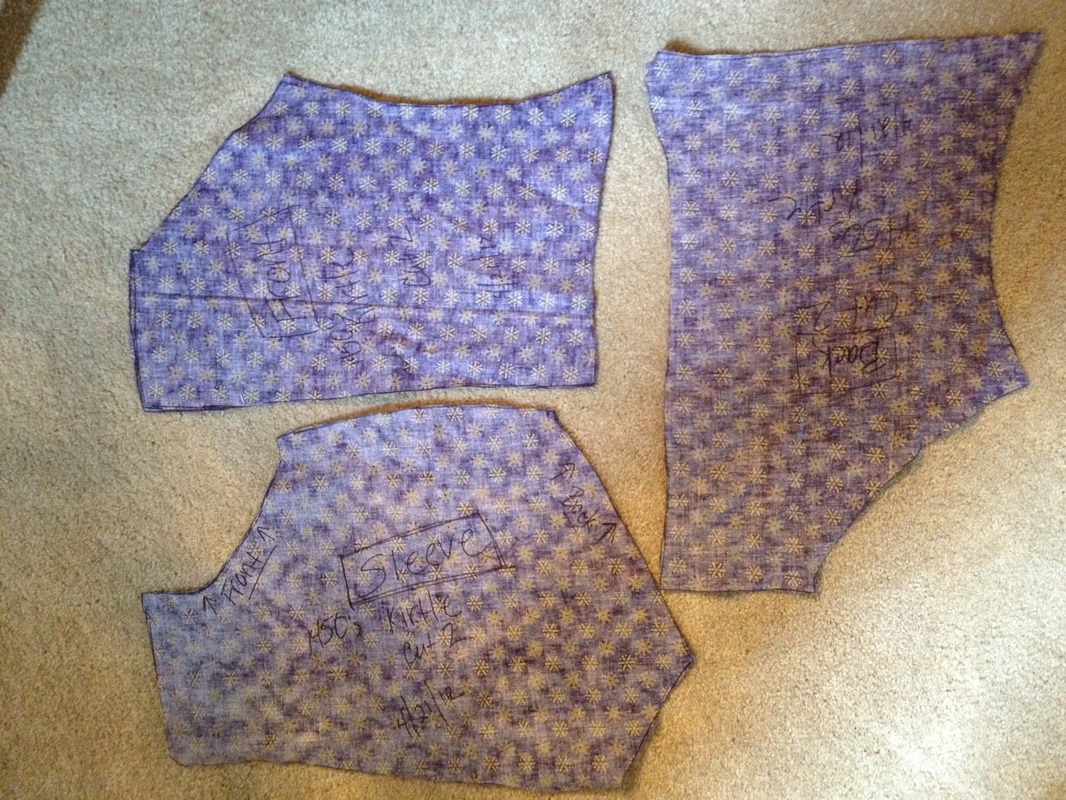
The body pattern was then laid out on my fabric and the skirting added, by forming a triangle from the waist to the bottom of the fabric as appropriate for my height. I was able to cut out the sleeves from the scrap. I then cut out gores from additional fabric piece of fabric. This portion is the same as explained in my handout construction of the gothic fitted dress under the Costuming heading.
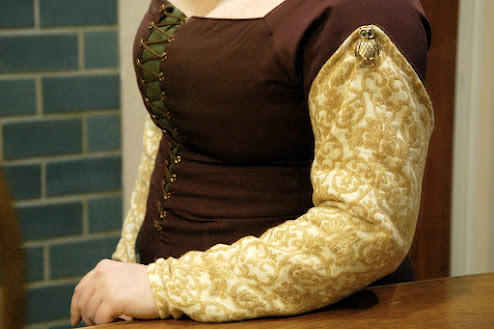
The gores were then attached to the body pieces and then the body was sewn together leaving the front open. Next the sleeves were sewn and attached to the body. I then used a cotton twill tape to add to the opening and around the neckline to strengthen the area and prevent stretching, especially of the sleeve tops. I tacked this in place and using a strong thread temporarily sewed in lacing to check the fit. I highly recommend this. I noticed that my sleeve caps migrated inwards quite a bit and it won’t lace completely over the bust. Luckily, there are several examples of it not completely lacing there so I’m not too upset, but I will be sure to adjust the front pattern a bit so future kirtles will allow me to completely lace myself in. In the meantime, I made a small rectangle of fabric to insert so the kirtle itself didn't show. Again, some examples show a differnt color in the front where the lacing was showing.
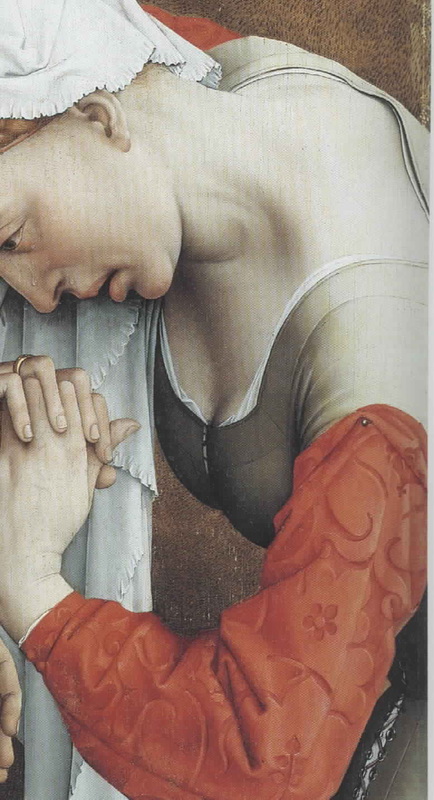
Next, I started hand stitching the twill tape into place using a back stitch. I quickly realized there was no visible difference between the hand stitching and machining, just that the latter was quicker, so I stopped and machined it in place. In the portrait above the stitch line can be seen, so don’t worry about trying to hide it. Next I roll hemmed the sleeves and bottom. Finally, I added the washers along the front for spiral lacing.
I also make the seperate sleeve that pinned on. This is just a detatched sleeve with a bit of a tip to pin to the bicept area of the kirtle sleeve.
The gores were then attached to the body pieces and then the body was sewn together leaving the front open. Next the sleeves were sewn and attached to the body. I then used a cotton twill tape to add to the opening and around the neckline to strengthen the area and prevent stretching, especially of the sleeve tops. I tacked this in place and using a strong thread temporarily sewed in lacing to check the fit. I highly recommend this. I noticed that my sleeve caps migrated inwards quite a bit and it won’t lace completely over the bust. Luckily, there are several examples of it not completely lacing there so I’m not too upset, but I will be sure to adjust the front pattern a bit so future kirtles will allow me to completely lace myself in. In the meantime, I made a small rectangle of fabric to insert so the kirtle itself didn't show. Again, some examples show a differnt color in the front where the lacing was showing.
Next, I started hand stitching the twill tape into place using a back stitch. I quickly realized there was no visible difference between the hand stitching and machining, just that the latter was quicker, so I stopped and machined it in place. In the portrait above the stitch line can be seen, so don’t worry about trying to hide it. Next I roll hemmed the sleeves and bottom. Finally, I added the washers along the front for spiral lacing.
I also make the seperate sleeve that pinned on. This is just a detatched sleeve with a bit of a tip to pin to the bicept area of the kirtle sleeve.


 RSS Feed
