The first step is to design a pattern for the general shape of the bodice. This helps if you have a friend that can lend some assistance. Otherwise, it’s a lot of on and off. One helpful hint is to lace your pattern front. It makes for easier on and off while making adjustments, especially if fitting yourself, and ensures a better fit rather than trying to pin it closed in the same spot time after time.
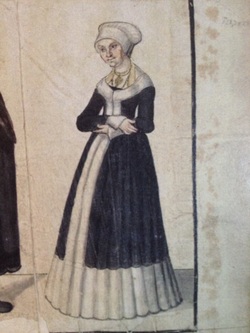
The sleeves are reminiscent of the late 14th century gothic fitted gown with the knuckle length cuffs. One major difference is the seam placement which is no longer along the back and side of the arm (similar to a suit jacket) but now under the arm as in most modern shirts. This is based off of the contemporary extant and the tailor’s pattern mentioned previously. Also, in referencing Mary of Hapsburg’s gown, the cuff is separate rather than a continuation of the sleeve.
In order to keep maximum arm mobility, the arm hole is as close to the shoulder joint as possible. This also encourages maximum self support from the garment, even if not adding any type of boning or other stiffeners. If using boning or other stiffeners, it is also recommended at this time to mark a line on the pattern for proper placement.
I have also discovered part of my issue with the Italian, which also has the stiffened bodice. When raising my shoulders, the bodice also lifts and doesn’t resettle without pulling on the bottom. I’m hoping that adding the boning will encourage it to stay put. It will correspondingly limit my ability to raise my arms straight above my head, but I’m thinking that may be better than constantly tugging at my gown every time I move.
Once a pattern is created, the internal workings of the bodice can be constructed using canvas, either cotton or linen. I cut out three of each of the bodice pieces, with the grain going in three different directions (grain, cross grain, and bias) and quilted them together to create one new piece using the linen canvas. IMPORTANT NOTE: Proper quilting uses a LOT of thread. This is a good opportunity to empty almost completed spools, get rid of colors that are not used, or use up old/junky thread.
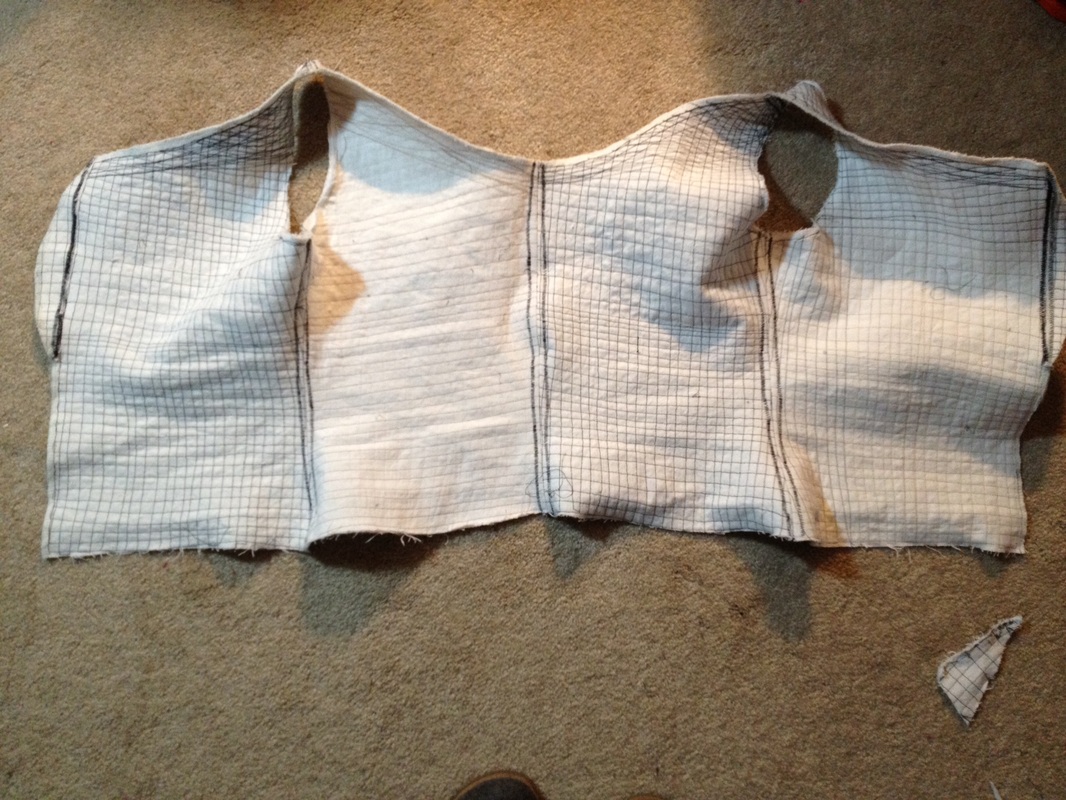
3 layers of linen canvas quilted together to form internal structure of bodice
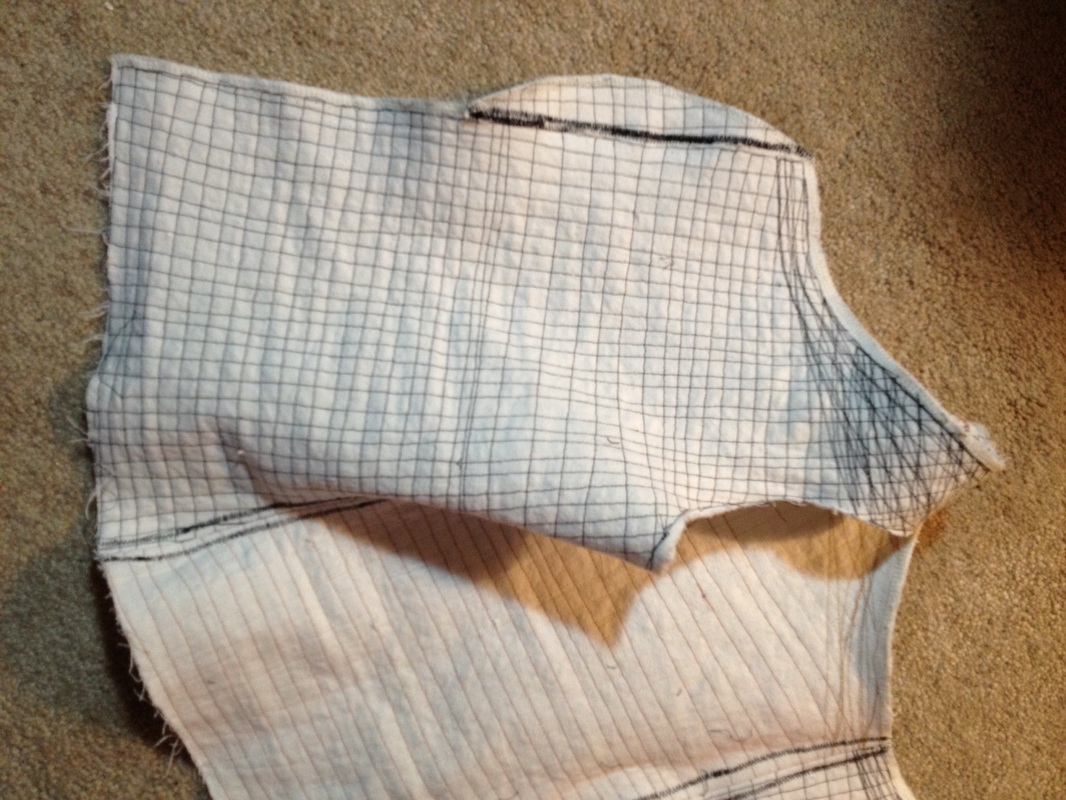
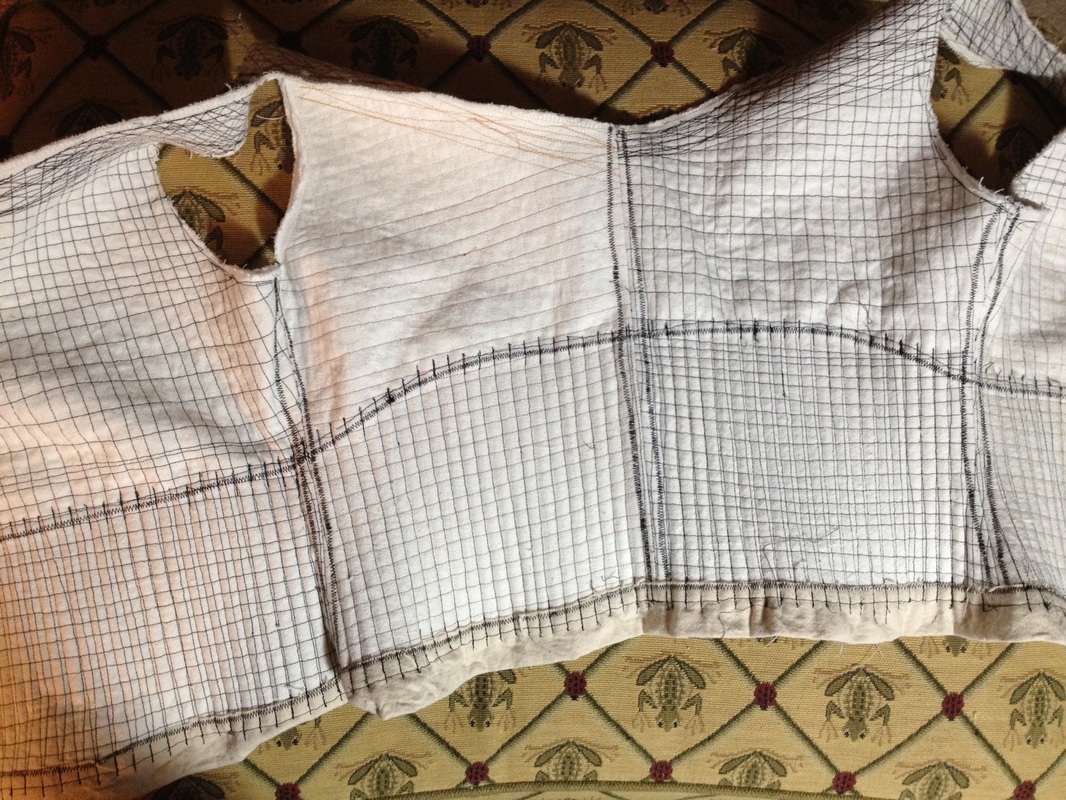
As can be seen in the pictures above, trying it on helps find issues in the pattern when dealing with a stiffer and less forgiving material than the patterning fabric, which in my case was creating more of an English silhouette rather than a German one. Additional quilted canvas can be added by simply overlapping fabric slightly, stitching in place and either zig zag stitching or adding additional quilting to help integrate the material. Trust me, no one will ever know you made these adjustments; just be sure to make them to your pattern.
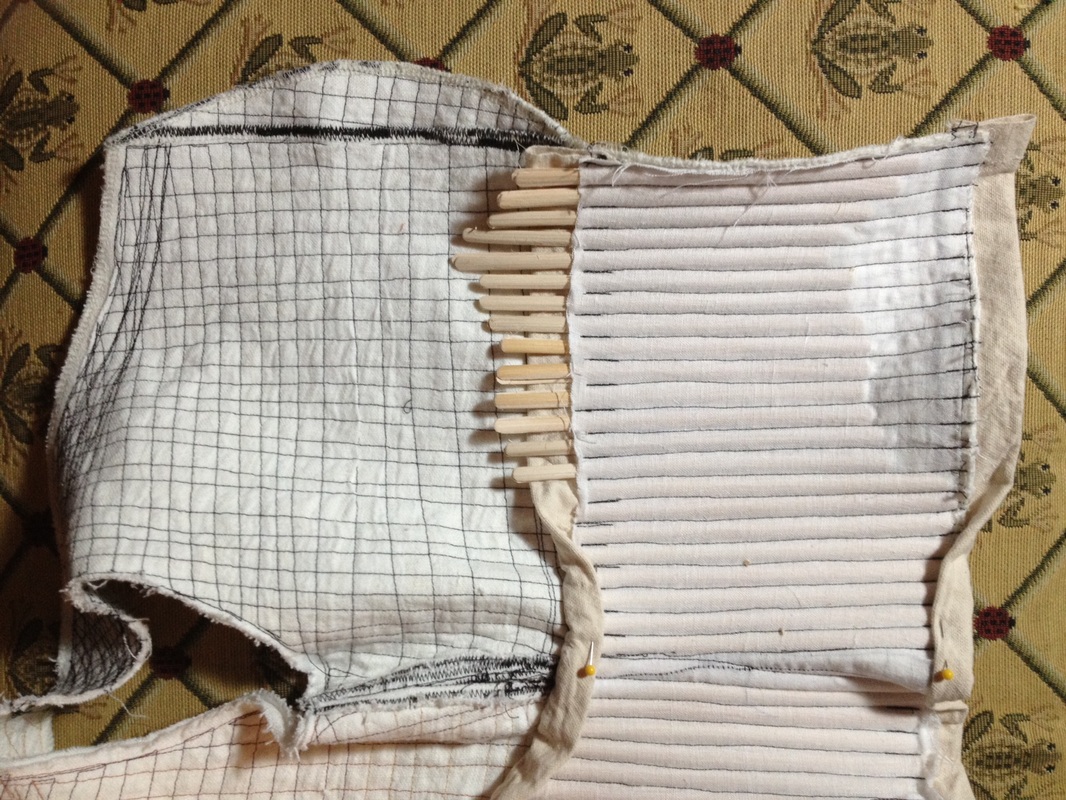
After quilting the canvas, comes the tricky part of placing the bones in the bodice. Using the pattern as a guide, I transferred the top line to the quilted canvas. Using Duck cloth, I cut 2.5” strips, folded them in half and place the raw edge roughly half an inch below the marked transfer line. This was then stitched in place and the raw edges zig zag stitched to keep the edges in place. I took another strip and folded it in half, placed the raw edge on the outside of the bottom portion of the bodice so that the folded edge hangs off the bottom, again roughly a half inch, stitched it in place and zig zaged the raw edge.
Next, taking some light weight linen in the shape of the boned area of the bodice, I laid the linen over the inside of the canvas bodice, with the top portion should be laying over roughly a quarter to half inch of the canvas strip (to your marked line). Since I was using two pieces of quarter inch flat oval reeds (back to back), I sewed 5/8 inch channels for the boning.
The reed was cut to the necessary length for the channels. I like to take some extra steps to finish the reeds and prevent them from poking through. First, rough cut a rounded edge with your scissors. Using fine grit sandpaper (220 grit), sand the edges smooth. This takes extra time, but prevents sharp edges that can poke you or ruin the garment. Once the bones were finished, I thread them into the channels and can now fold the duck cloth over the edges and whipstitch in place.


 RSS Feed
