
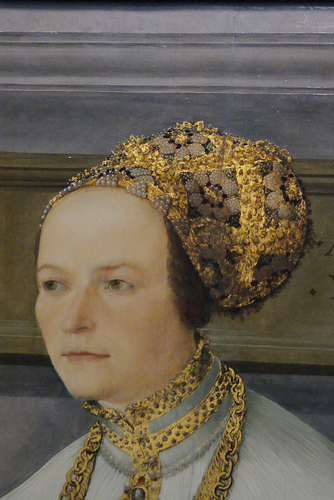
Love them or hate them, this unusual hat completes most early 16th century German outfits. It appears to defy gravity with the large bulge or “wulst” that seems to perch slightly above and at the back of the head. While researching various construction methods, several stating to be the one period method, and examining dozens of portraits and drawings, the reality of this hat struck. There is no one way.
To date there has been no findings of extant Wulsthaube to help recreators pattern one. I have found no indication in a drawing or painting indicating what it would look like when not on the wearer or of a wearer in the midst of donning one that might assist with its construction. Likewise the paintings and drawings of one vary considerably.
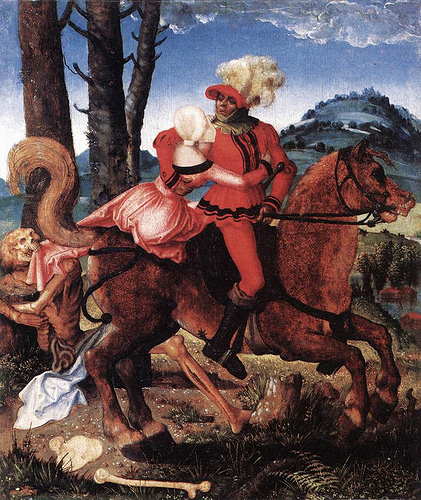
Some look like nothing more than a large bandana tied over the head with hair heaped under. Others appear to have a piece that covers the hair and wulst and then a decorated veil over top. On others the cap portion is what’s decorated and the veil is sheer. Some have a long tail that can wrap around the neck or chin and back around while others simply end at the nape. Some are plain and white while others are decorated with anything from small gold lattice or stripe work to heavy embroidery and pearled flowers.
To date there has been no findings of extant Wulsthaube to help recreators pattern one. I have found no indication in a drawing or painting indicating what it would look like when not on the wearer or of a wearer in the midst of donning one that might assist with its construction. Likewise the paintings and drawings of one vary considerably.
Some look like nothing more than a large bandana tied over the head with hair heaped under. Others appear to have a piece that covers the hair and wulst and then a decorated veil over top. On others the cap portion is what’s decorated and the veil is sheer. Some have a long tail that can wrap around the neck or chin and back around while others simply end at the nape. Some are plain and white while others are decorated with anything from small gold lattice or stripe work to heavy embroidery and pearled flowers.


Ultimately, this garment was a staple to the wardrobe but varied as much as modern hats can.
The method I chose was based on how I could achieve my desired look without a major time commitment to put it on. (Time consuming hats never work well when trying to wrangle a small child.) Most methods I found seemed to produce a perfectly viable wulsthaube, but the one relied upon the most (with modifications for my needs and specific look I wanted) can be found at http://www.gluckliche-eme.com/AnEasyWulsthaube.pdf.
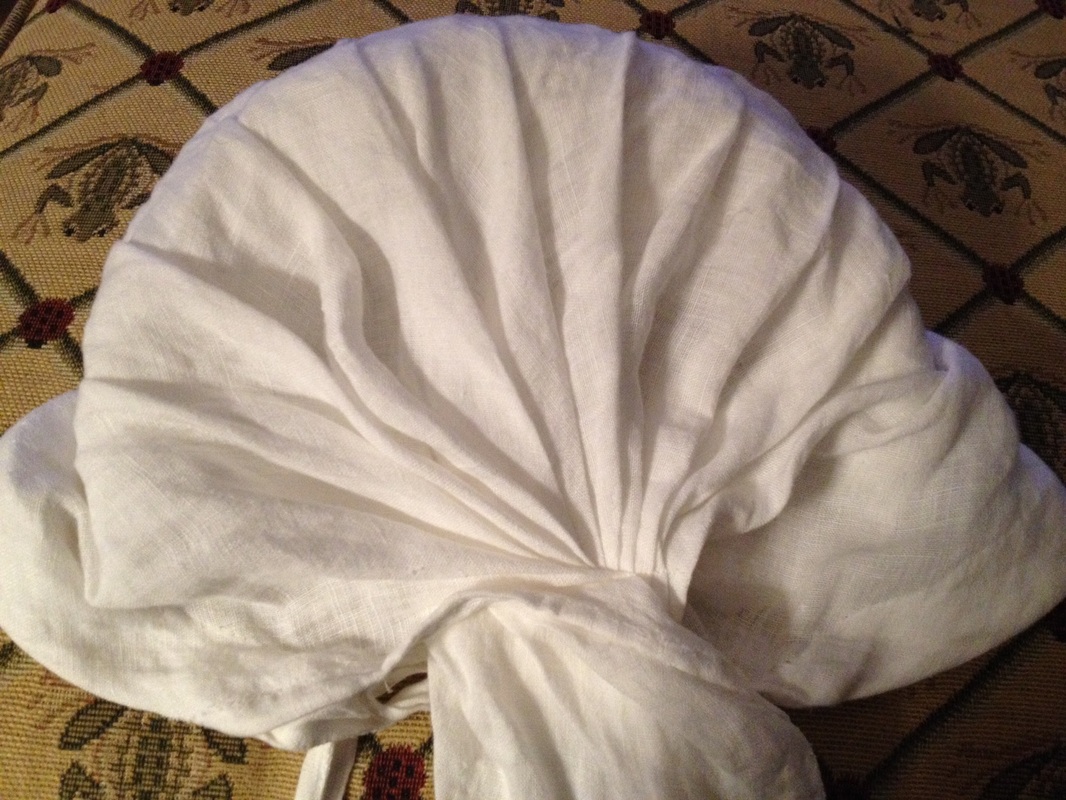
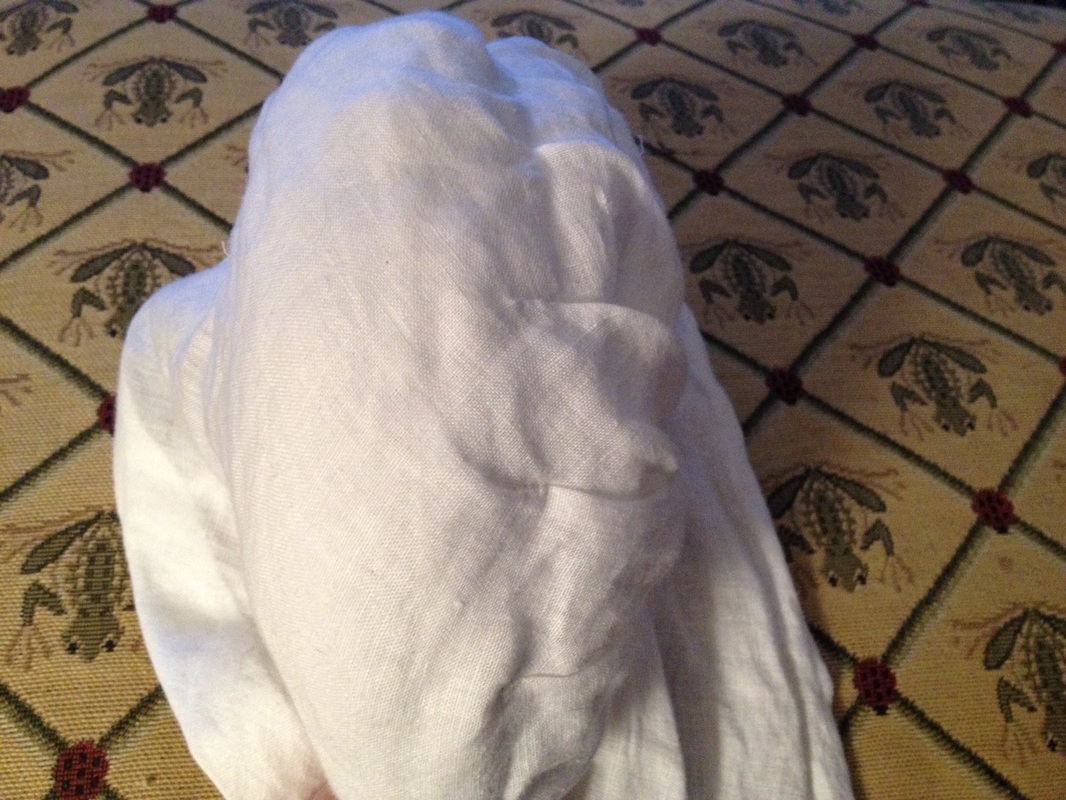
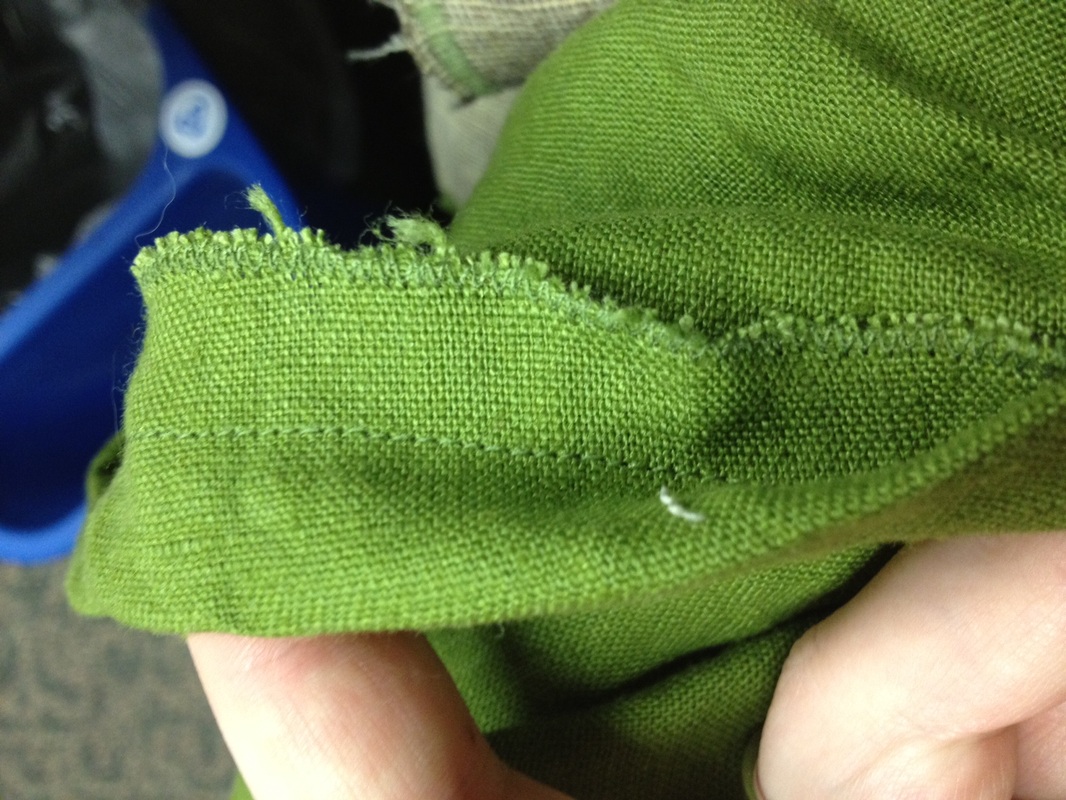
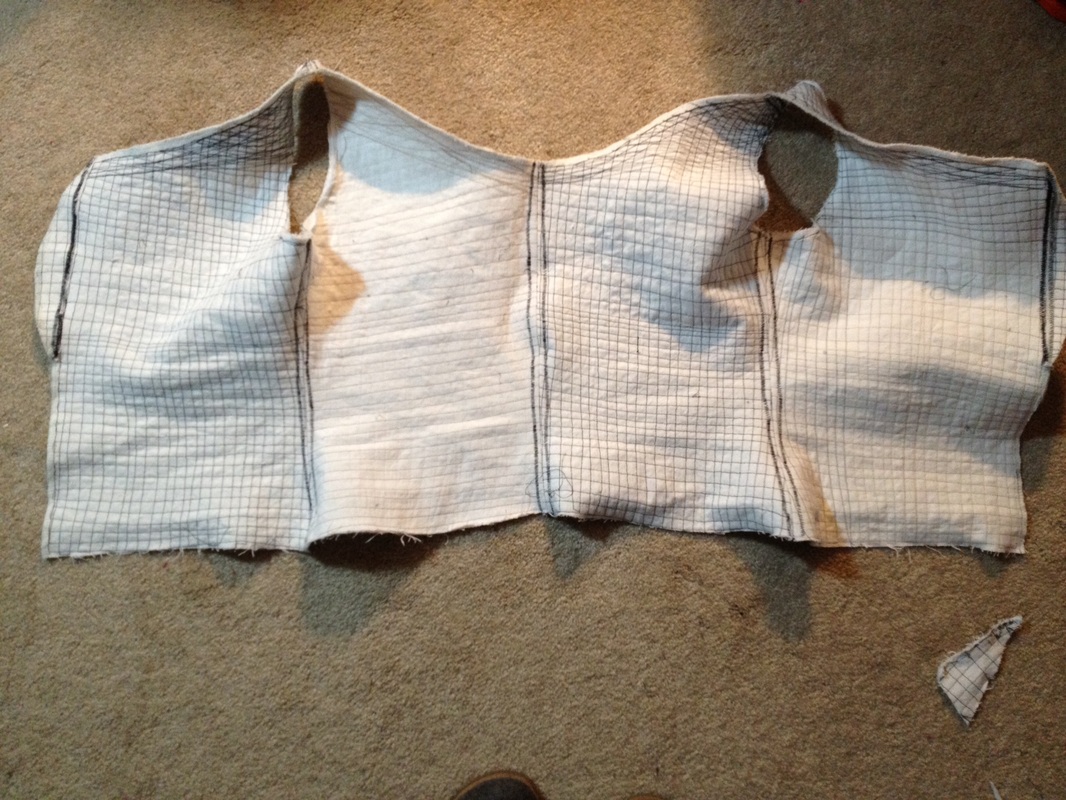
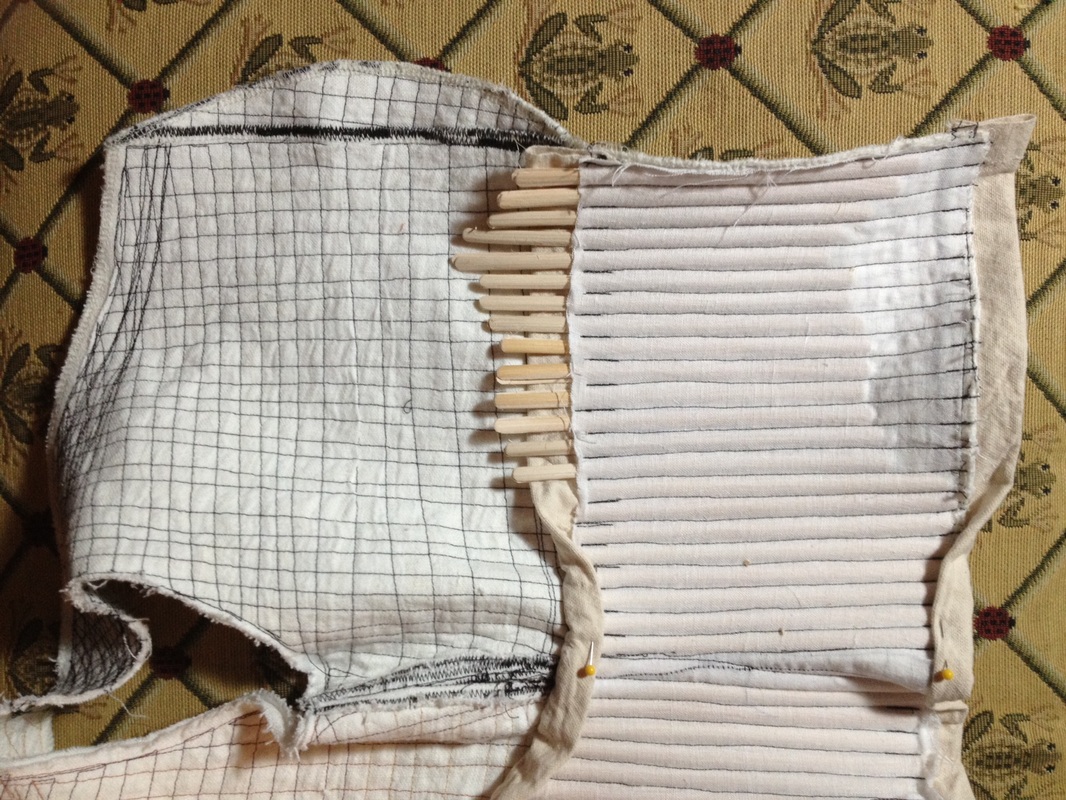
To make mine, I first found some white linen scraps to make the wulst. I folded the fabric in half and cut out a long, fat banana shape and sewed the edges, leaving a small opening to allow me to turn it. I also snipped the edges to allow it to bend better without pulling. Once it was turned right side out, I stuffed it with poly fill. Before it got too full, I also added a coat hanger wire slightly shorter than the wulst with the edges turned up so they don’t poke through. This allows the wulst to keep its shape a bit easier than relying on tension alone. I then finished stuffing the wulst till it was tightly packed and sewed the opening closed making sure this was as smooth as possible to avoid odd bumps or bulges when the wulsthaube is finished.
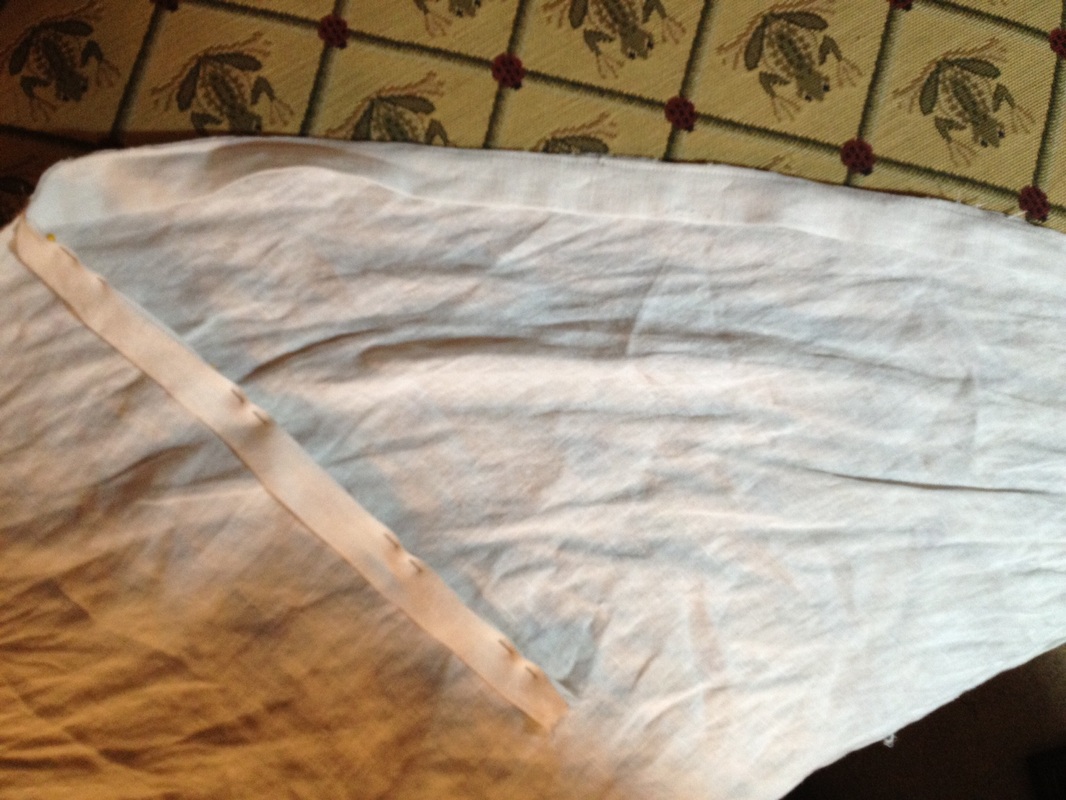
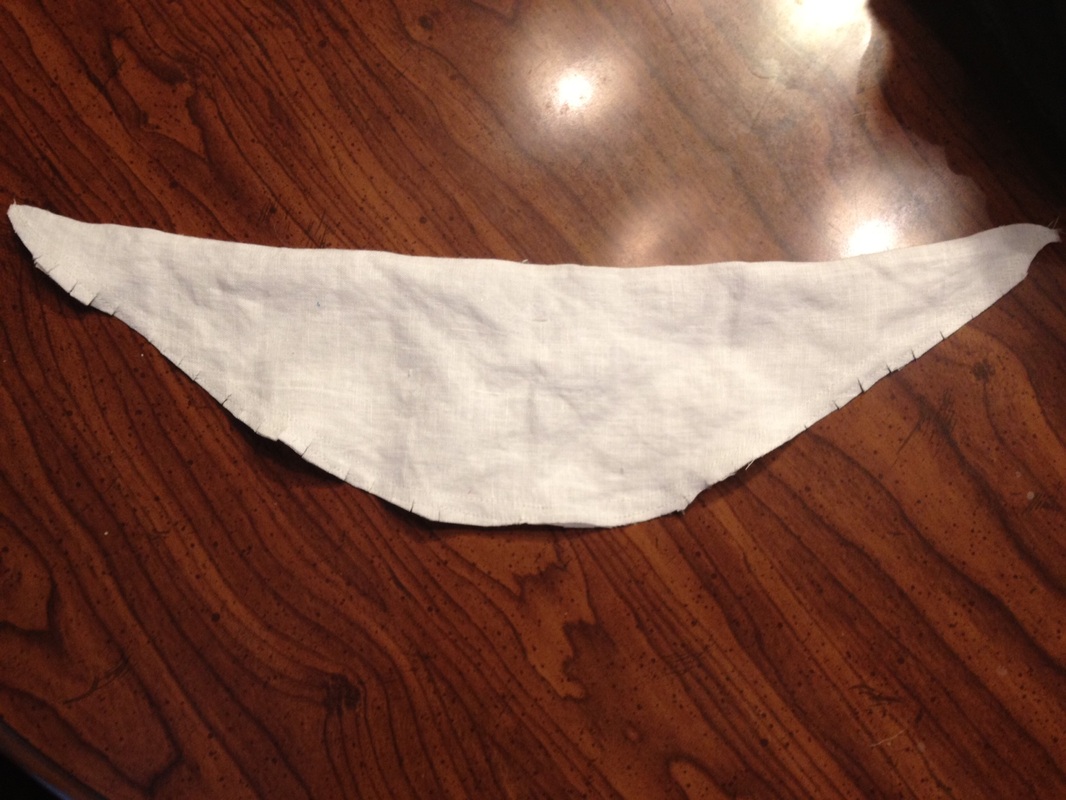
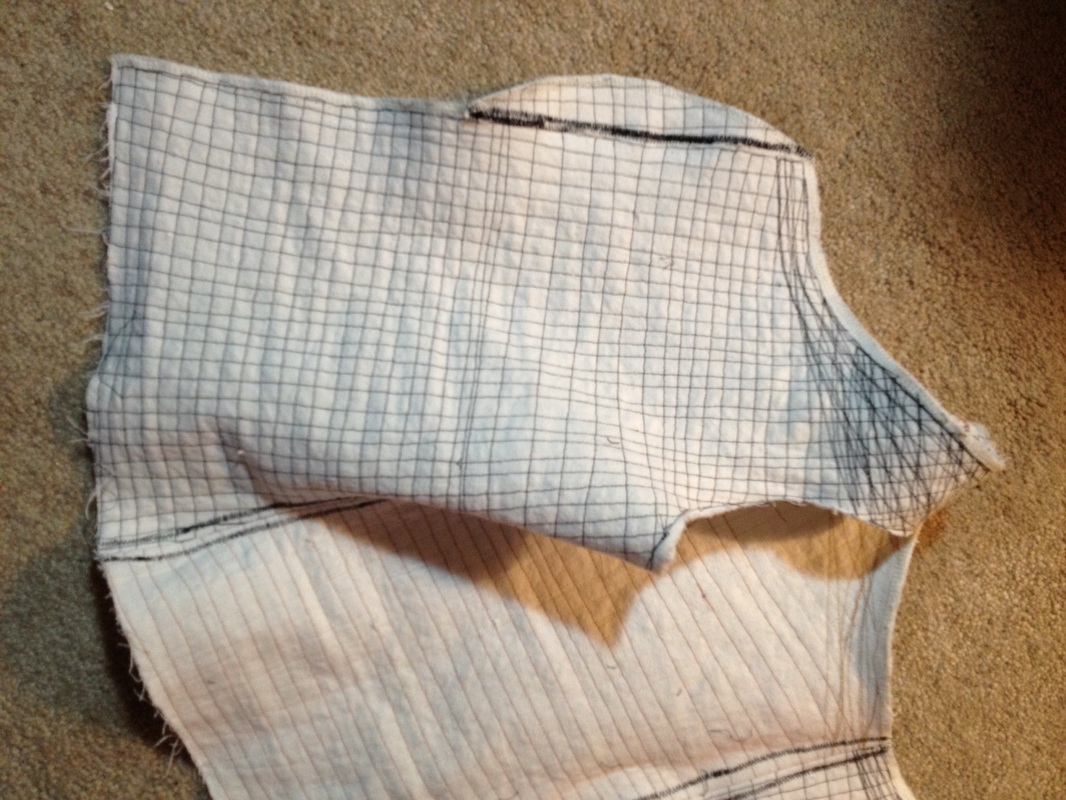
Using a larger piece of linen I played with the appropriate length I would need. This was done by tying it onto my head like a bandana, but a bit more forward to cover the hairline, and placing the wulst underneath, being sure the back would be covered to the nape. Anyone who has ever worn a bandana for any length of time, especially a linen one in summer, knows one universal truth, after a bit the bandana will slip back due to the bias and fabric stretching. To prevent this, I cut off the triangular piece on my cover that was folded back when testing. I then cut a strip of linen on the grain (so it doesn’t stretch) and folded it in two. This strip was long enough to go around my head and tie at the nape. With right sides together I attached the folded strip to the cover with the raw edges out and then folded the strip over to cover the open edge and stitched in place.
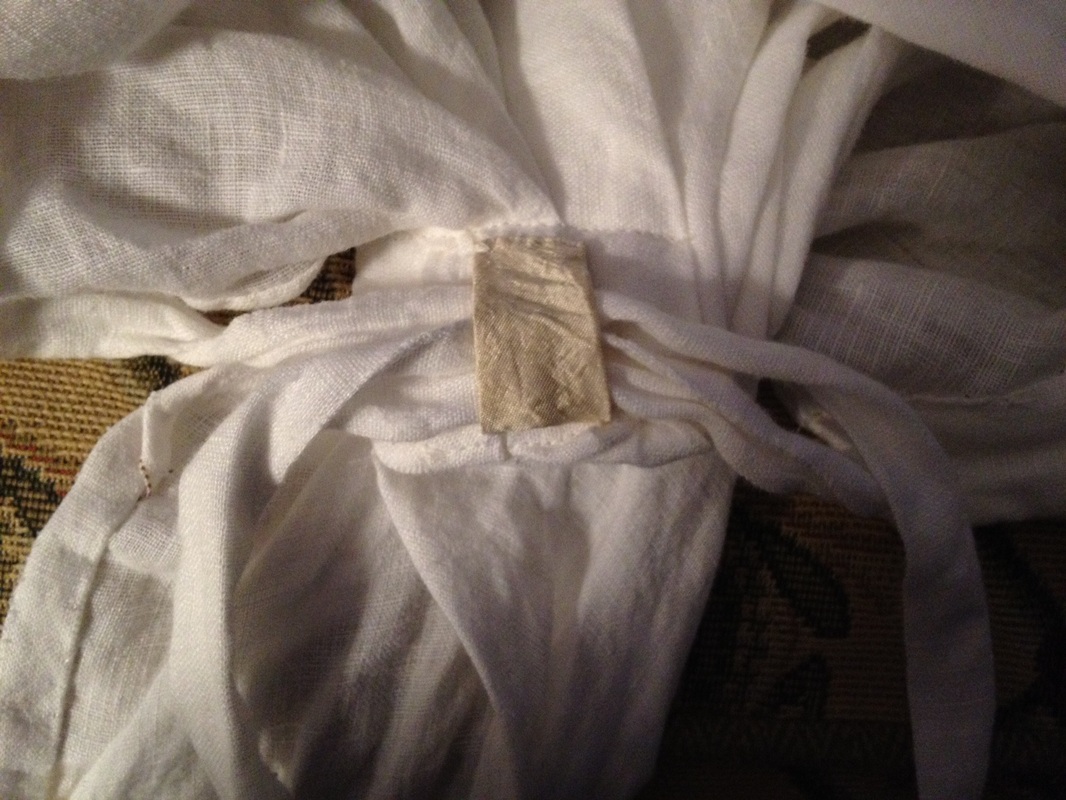
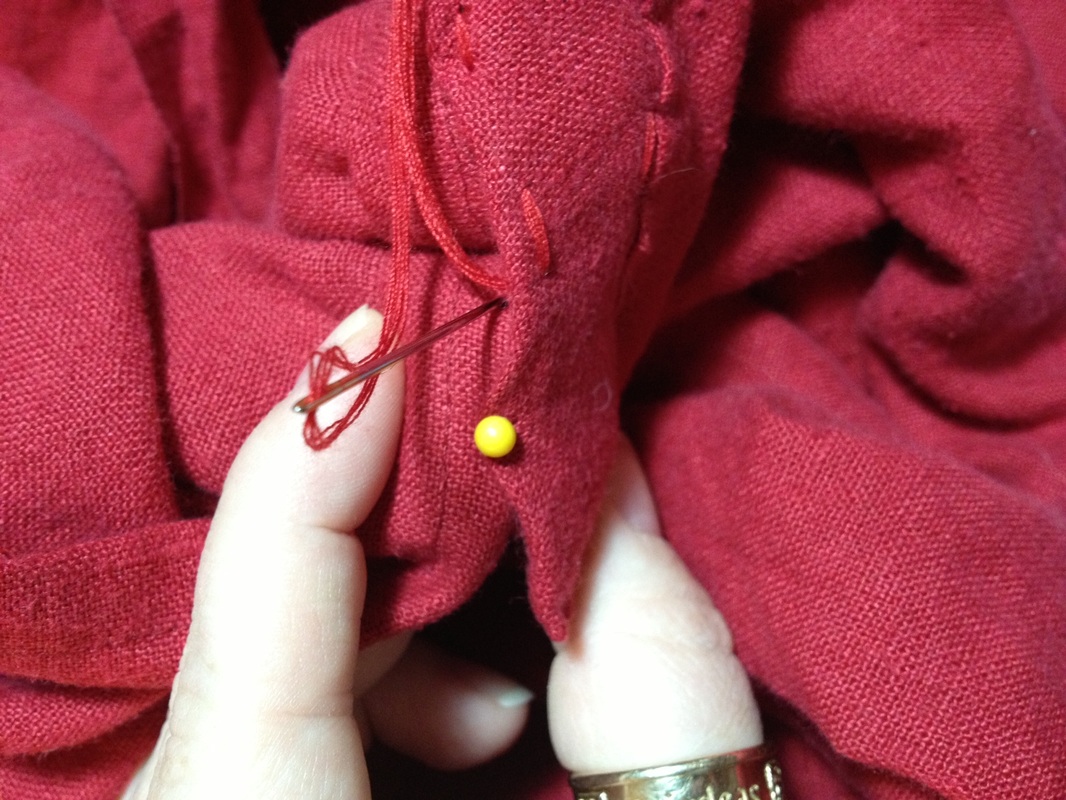
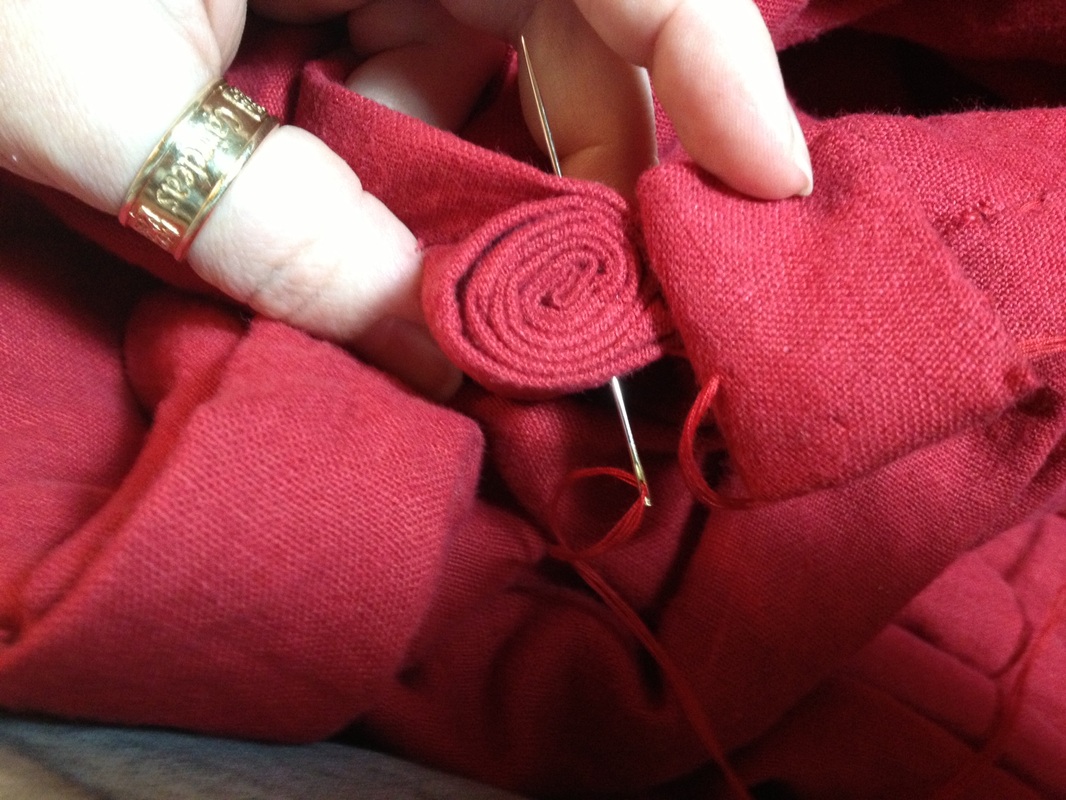
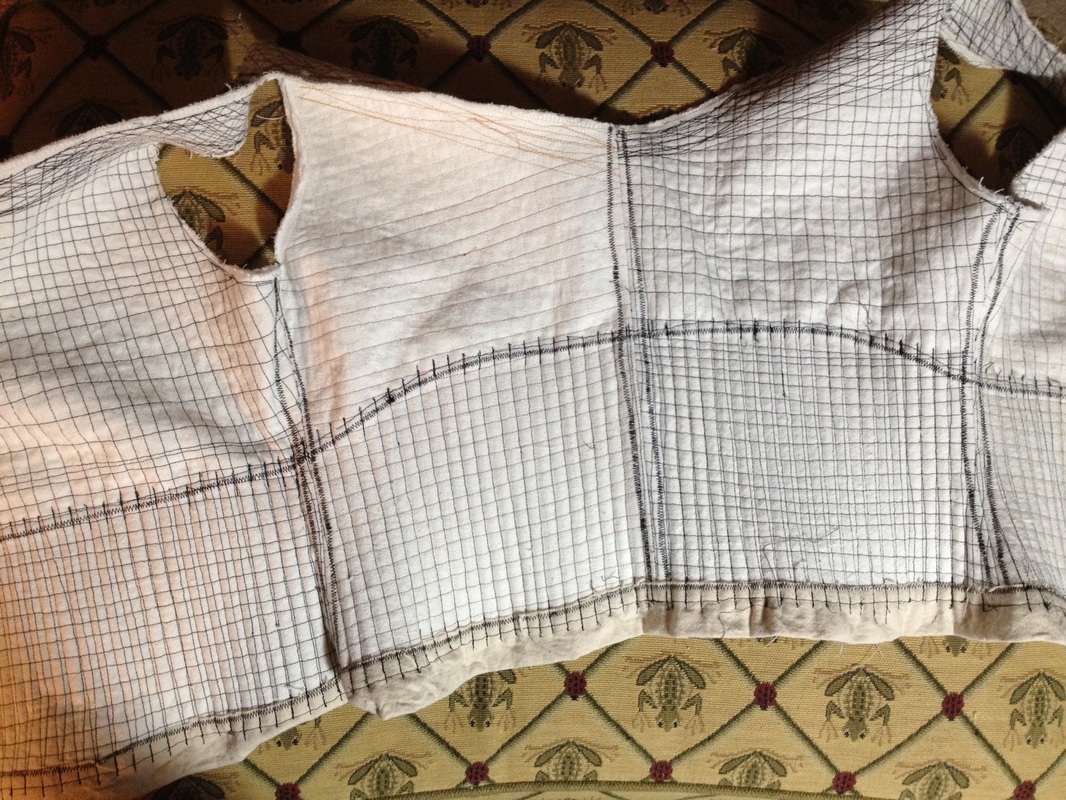
Once again I tied the cover and inserted the wulst. Once it was placed where I wanted it, I pinned the wulst in place. Carefully removing the entire piece from my head then started pulling the draped fabric into folds along the back and stitched the gathered section at the base as well as tacked the top of the gathers to the wulst. The excess from the gathering was cut off three inches below the stitched line. The raw edged were folded in on themselves and the edge was sewn shut. Since I was using scrap linen I had, it had a long salvage end that I was able to leave in order to wrap around the base and hide my stitching when I put the cover on. This will have to be added if your fabric doesn’t have the anomaly; be sure to finish the edges for this.
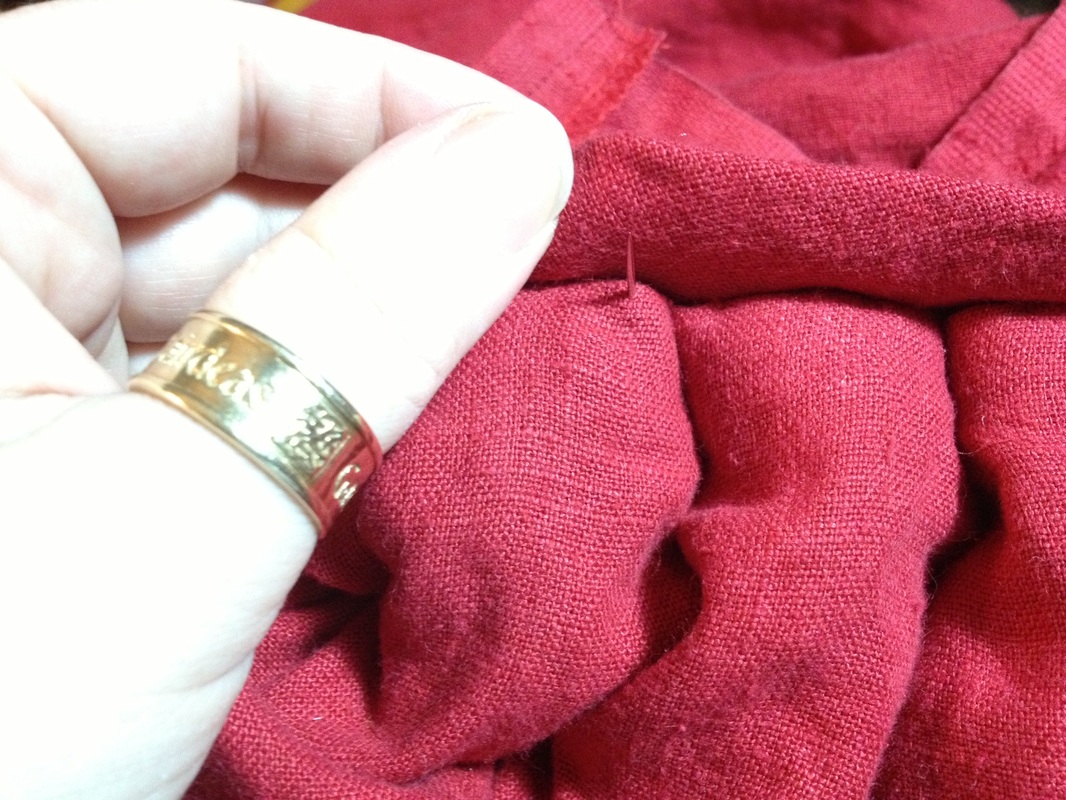
On the underside of the gathered section I added a small loop for the ties to pass through. This helps pull down the back of the cover and keeps everything taunt.
The method I chose was based on how I could achieve my desired look without a major time commitment to put it on. (Time consuming hats never work well when trying to wrangle a small child.) Most methods I found seemed to produce a perfectly viable wulsthaube, but the one relied upon the most (with modifications for my needs and specific look I wanted) can be found at http://www.gluckliche-eme.com/AnEasyWulsthaube.pdf.
To make mine, I first found some white linen scraps to make the wulst. I folded the fabric in half and cut out a long, fat banana shape and sewed the edges, leaving a small opening to allow me to turn it. I also snipped the edges to allow it to bend better without pulling. Once it was turned right side out, I stuffed it with poly fill. Before it got too full, I also added a coat hanger wire slightly shorter than the wulst with the edges turned up so they don’t poke through. This allows the wulst to keep its shape a bit easier than relying on tension alone. I then finished stuffing the wulst till it was tightly packed and sewed the opening closed making sure this was as smooth as possible to avoid odd bumps or bulges when the wulsthaube is finished.
Using a larger piece of linen I played with the appropriate length I would need. This was done by tying it onto my head like a bandana, but a bit more forward to cover the hairline, and placing the wulst underneath, being sure the back would be covered to the nape. Anyone who has ever worn a bandana for any length of time, especially a linen one in summer, knows one universal truth, after a bit the bandana will slip back due to the bias and fabric stretching. To prevent this, I cut off the triangular piece on my cover that was folded back when testing. I then cut a strip of linen on the grain (so it doesn’t stretch) and folded it in two. This strip was long enough to go around my head and tie at the nape. With right sides together I attached the folded strip to the cover with the raw edges out and then folded the strip over to cover the open edge and stitched in place.
Once again I tied the cover and inserted the wulst. Once it was placed where I wanted it, I pinned the wulst in place. Carefully removing the entire piece from my head then started pulling the draped fabric into folds along the back and stitched the gathered section at the base as well as tacked the top of the gathers to the wulst. The excess from the gathering was cut off three inches below the stitched line. The raw edged were folded in on themselves and the edge was sewn shut. Since I was using scrap linen I had, it had a long salvage end that I was able to leave in order to wrap around the base and hide my stitching when I put the cover on. This will have to be added if your fabric doesn’t have the anomaly; be sure to finish the edges for this.
On the underside of the gathered section I added a small loop for the ties to pass through. This helps pull down the back of the cover and keeps everything taunt.


 RSS Feed
