A month or so before a Turkish themed SCA event I decided to make my husband an outfit to fit the theme. I researched Ottoman Turk men’s clothing, and my favorite fabric shops for just the right fabric. The hardest part was that my husband gets warm rather quickly, so I was really leaning toward linen to help keep him more comfortable. That’s when I started having problems.
See, solid colored linen is found easily enough. A jacard or even printed linen (meaning 100% linen or even a linen/cotton or other natural fiber blend) proved to be a much harder task. I found a great extremely light wool to use for the ceremonial kaftan (that would show his noble rank), but finding a linen that really looked nice for the entari or inner kaftan proved elusive. I found some great dark teal linen in my stash, but it just looked so plain compared to the wool for the ceremonial kaftan. Not to mention that as I scrolled through my inspiration pictures I found the entari was almost always printed; unlike the ceremonial kaftan in which I found several example of either plain or decorated fabrics.
Here's my main inspiration, not only because of the great colors, but also because the miniature reminded me of my husband.

Thus, an idea formed. BLOCK PRINTING!!
As a caveat, this is not for the weak! There is a lot of prep work and this takes time. Also, if you don’t have a table (and I recommend a table) you can use the floor but I highly recommend knee pads or something to kneel on.
Block Printing is a simple enough concept that has been historically used to decorate fabric. Using a wooden block with a carved design and some dye the choices of decorated fabric become limitless. Not being a carver, I decided to make my own stamp to use to decorate the plain linen I found.
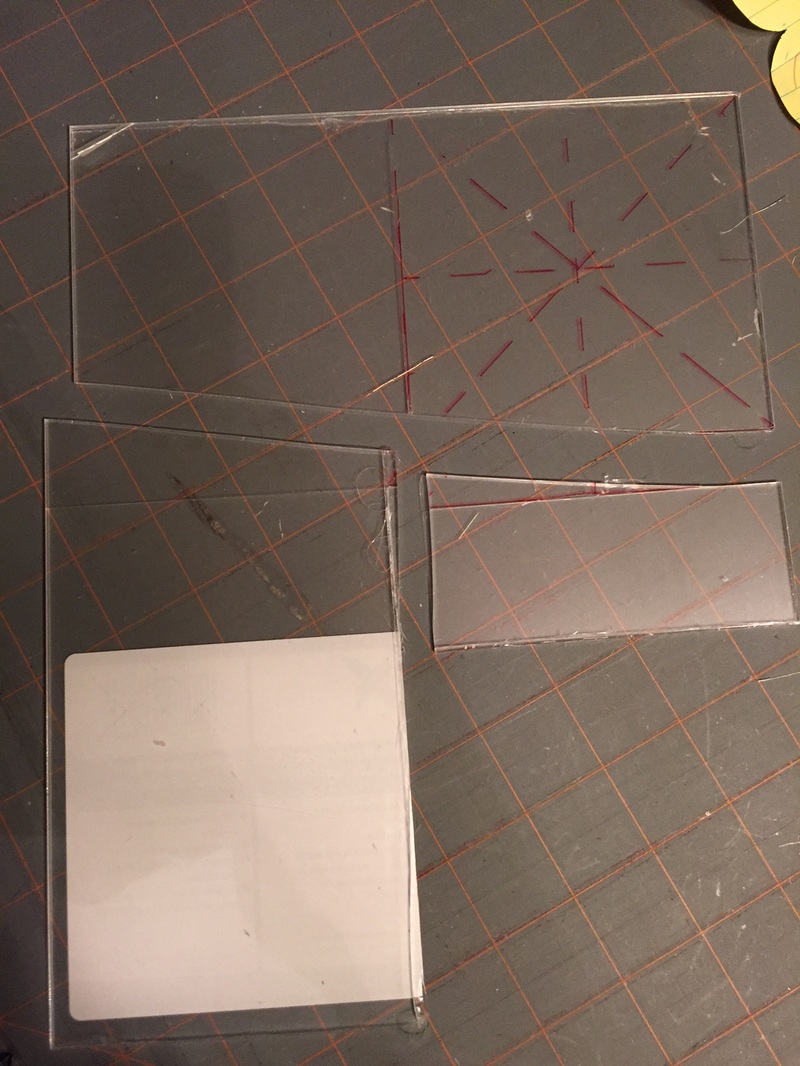
To start, I bought some clear acrylic (plexiglass) at the hardwear store for a few bucks. Yes, you can use wood instead of the acrylic. I choose the acrylic so I could see exactly where I was placing the design to ensure better accuracy. Use what makes you happy.
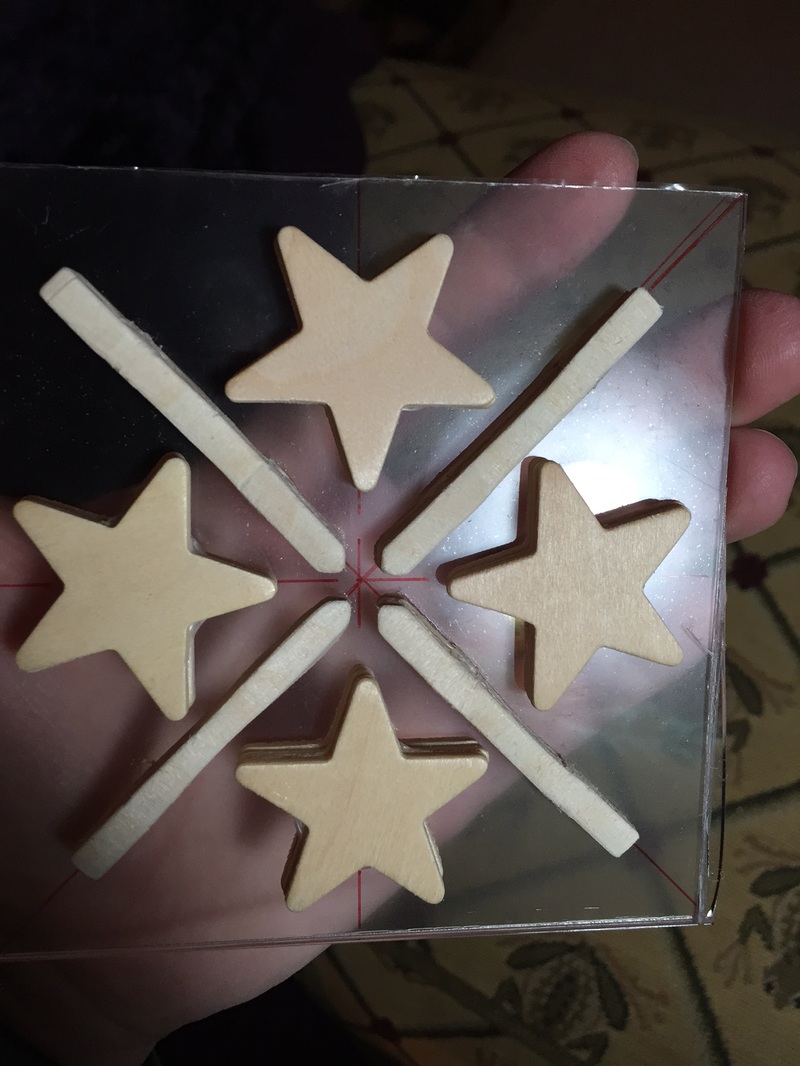
I then bought wooden cutouts to put into my design. I found a great inspiration pattern, not to mention the drawing reminded me of my husband, and since I already had wooden stars from another project I used those. The lines were a bit more of a challenge. These were from a wooden fence packet that cut the connectors off.
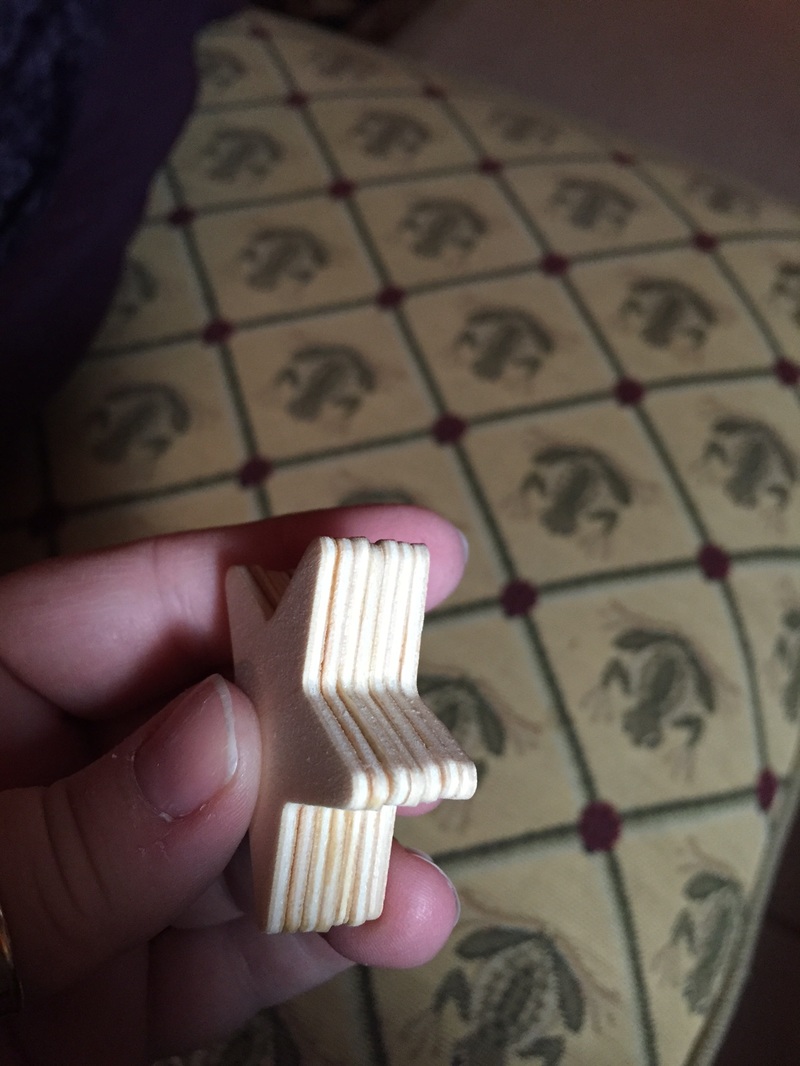
I then glued three of the stars and two of the fence post pieces together which made them each the same height. Next I sanded the sides of the fence posts where I cut them so it didn’t create an odd defect when I stamped using my block.
To make the block, leaving the protective film on it, I drew gridlines to make a square block and to center my design. Because I only had a small piece, I hand “cut” the acrylic. Well, not truly cut. I scored the lines using my rotary and quilting square. Then turned it over and repeated. Once I got several cuts in I pushed on either side to snap the acrylic along the score lines.
Make sure you score deep for this. My first attempt didn’t quite go according to plan and the line went way off. It came out much better the second time.
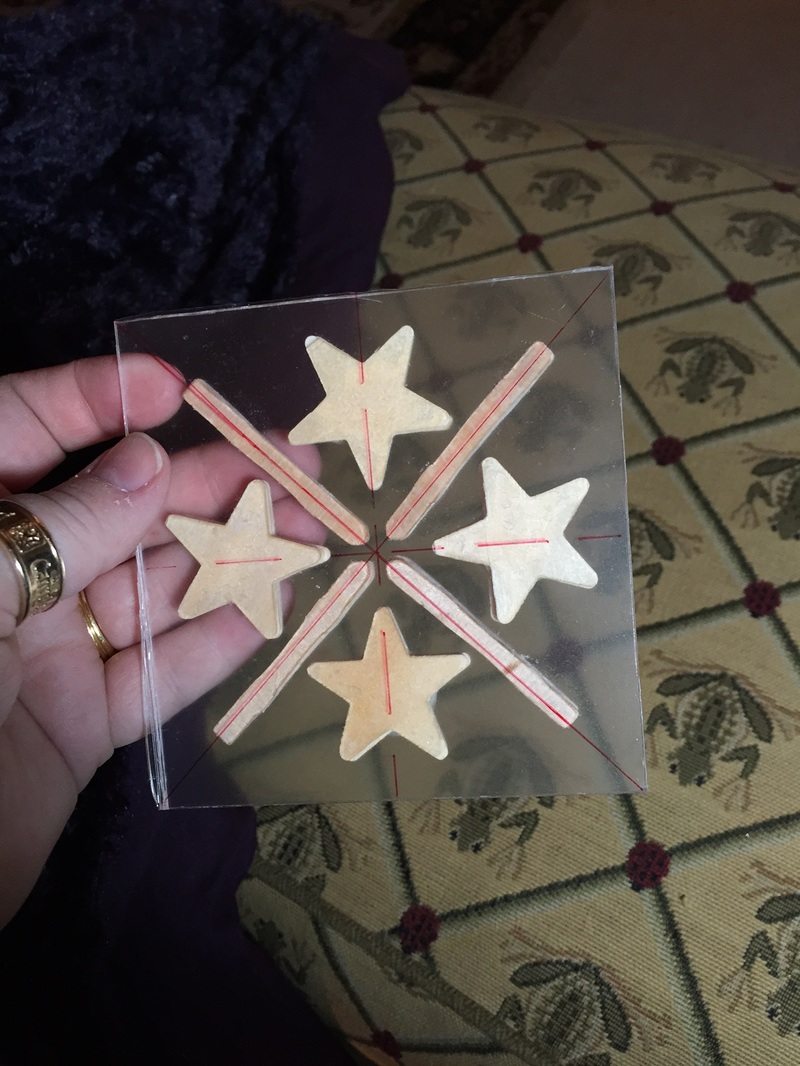
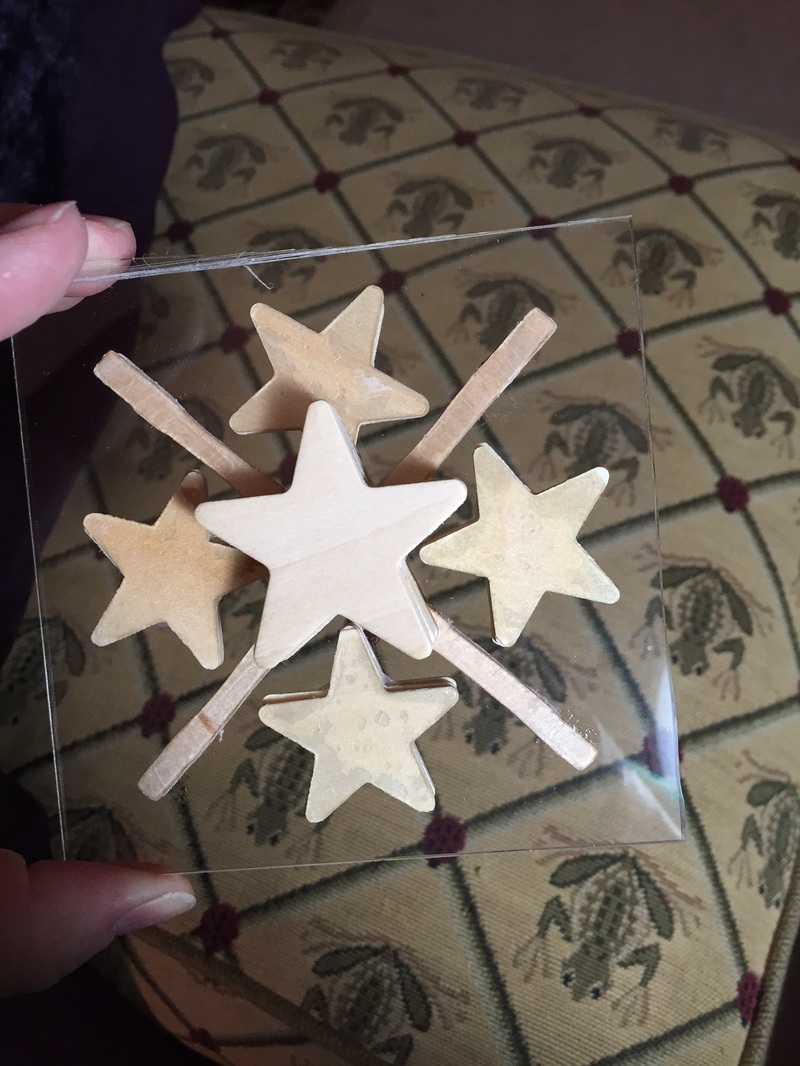
Now I peeled off the protective film on the unmarked side and using superglue glued the wooden cutouts in my pattern. Once dried, I peeled off the grid side in order to attach my handle. You can use whatever you want. I simply glued more of the stars together to create a handle and glued it in the middle of my design on the back. This allowed me maximum visibility and a convenient way to pick up the block.
As a caveat, this is not for the weak! There is a lot of prep work and this takes time. Also, if you don’t have a table (and I recommend a table) you can use the floor but I highly recommend knee pads or something to kneel on.
Block Printing is a simple enough concept that has been historically used to decorate fabric. Using a wooden block with a carved design and some dye the choices of decorated fabric become limitless. Not being a carver, I decided to make my own stamp to use to decorate the plain linen I found.
To start, I bought some clear acrylic (plexiglass) at the hardwear store for a few bucks. Yes, you can use wood instead of the acrylic. I choose the acrylic so I could see exactly where I was placing the design to ensure better accuracy. Use what makes you happy.
I then bought wooden cutouts to put into my design. I found a great inspiration pattern, not to mention the drawing reminded me of my husband, and since I already had wooden stars from another project I used those. The lines were a bit more of a challenge. These were from a wooden fence packet that cut the connectors off.
I then glued three of the stars and two of the fence post pieces together which made them each the same height. Next I sanded the sides of the fence posts where I cut them so it didn’t create an odd defect when I stamped using my block.
To make the block, leaving the protective film on it, I drew gridlines to make a square block and to center my design. Because I only had a small piece, I hand “cut” the acrylic. Well, not truly cut. I scored the lines using my rotary and quilting square. Then turned it over and repeated. Once I got several cuts in I pushed on either side to snap the acrylic along the score lines.
Make sure you score deep for this. My first attempt didn’t quite go according to plan and the line went way off. It came out much better the second time.
Now I peeled off the protective film on the unmarked side and using superglue glued the wooden cutouts in my pattern. Once dried, I peeled off the grid side in order to attach my handle. You can use whatever you want. I simply glued more of the stars together to create a handle and glued it in the middle of my design on the back. This allowed me maximum visibility and a convenient way to pick up the block.
Once my stamp was made it was time to test it. I choose metallic gold fabric paint by Tulip. This is trial an error. I found it best to squeeze a thin layer of paint onto a paper plate about the size of my block. Then I would put the block in and move it around some to ensure good coverage and press it down on the plate (which helped stop gooing out the sides. Then place on fabric, pressing down on the center and edges, lifting quickly straight up. Having a brush handy to help fill in blanks or remove glops along the edges was also helpful.
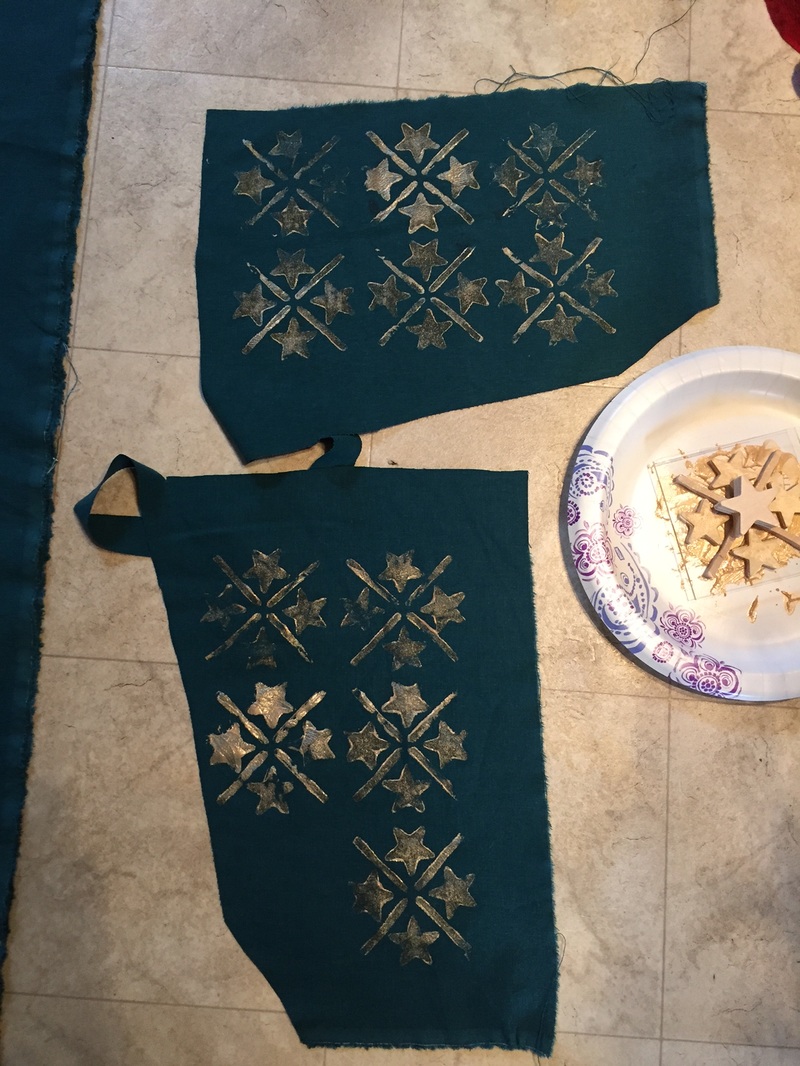
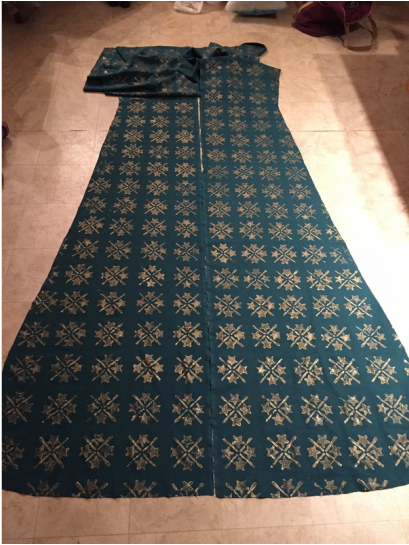
After that it was off to the races and block printing away on a full length entari for a 6 foot 2 inch tall man. It took me roughly 10-12 hours of stamping to do 4 sides, 2 gores, and 2 sleeves, while fending off a young child and two cats.
Overall, I’m happy with the final product. I just hope my husband is as well!
Overall, I’m happy with the final product. I just hope my husband is as well!
 RSS Feed
