Fitted Dress

Braque Family Triptych (detail) by Rogier van der Weydan, c. 1450
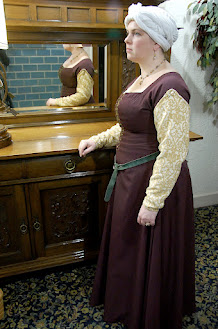
The fitted dress is known by several names to modern researchers (gothic fitted dress, cotehardie and kirtle to name a few). The beauty of this gown lies in it's simplicity and the way it revolutionized medieval clothing. Prior to the 1300s the gowns were primarily loose T-tunics. Then fashion evolved and the desire for a more fitted gown became prevelent. The gown grew tighter and tighter until it was no longer possible to slip on and off and closures had to be added. With inset sleeves, the gown could continue to become more fitted.
The fitted dress, with various on sleeve types and fittedness continued throughout the 14th and 15th centuries and even into the early 16th century as an underdress.
Personally, one of my favorite aspects of this gown is the fact that it is a self supporting garment and the lines of garmet can be adjusted to complement the wearer's figure. Further it is very comfortable and versitile. It can be constructed from plain linen or wool, made from beautiful brocades, embroidered, or pearled with devices. A surcoat can be added or removed, it can be worn under other garments or by itself. It can lace or button. All and all, it's a great foundational garment for anyone getting started.
1450s style Kirtle
Patterning
If you are considering making this garment, the first thing you'll want is to create a pattern. Sure you could go and purchase commercial patterns, but they'll only help you so much, since they aren't specifically tailored to you. Creating a pattern is easy.
First, get some cheap nonstretchy fabric (a cotton or muslin work great) to create your pattern - roughly 3 yards. Second, find friend you don't mind getting a bit personal with. Next cut your fabric into thirds. Place one third aside for your sleeve. With the other two pieces, cut them in half lengthwise so you end up with four quarters which should be large enough to cover each quarter of your body.
Enter friend. Have them pin the pieces tightly to your body. These pins will be bent out of shape, so don't be surprised. Also, be sure to lift your chest to get the best fit. I highly recomment removing any bra or other support since it can distort the fit. You should be pinned all the way up the arm until its in the arm pit. Trust me, this is very important. If it doesn't go all the way up you'll end up with a larger arm hole, that once the sleeve is attached, will limit your mobility.
Once you are sufficently pinned and the lines are straight, have your frined mark the line where the pins are. Feel free to cut away any excess fabric that is hampering the marking at this time. Before unpinning anything, mark the neckline, arm holes, waist line and/or hip line (where you want the gown to stop being fitted and start to flare out for the skirt. I find it best to carefully cut out the arm holes and neckline. The arm should be able to fully rotate without bunching the fabric.
You can now design you sleeve shape and pin it in place to ensure the best fit. Keep in mind the seam should go along the back of the arm like a suit coat, not under it. Be sure you can bend and flex your arm. You can then mark where the sleeve joins the arm hole you created and mark the lines you have pinned.
Now remove the pins and admire your pattern. Your two front and two back pieces should be relatively the same size. You can dispose of one of the fronts and one of the backs of your new pattern. Next, identify the piece (front or back) with your name and the date - just so you remember when you did it for latter reference. I find it best to cut and smooth the lines marked the friend and then note on the pattern that seam allowances need to be added.
Having created the custom pattern, you can now create several fitted dresses. I have included a handout I use when teaching a class on this topic for sewing instructions of your pattern. Please note, you are welcome to share it with others who are interested as long as you don't alter it and you provide appropriate credit.
| making_a_tailored_cotehardie_website.pdf |
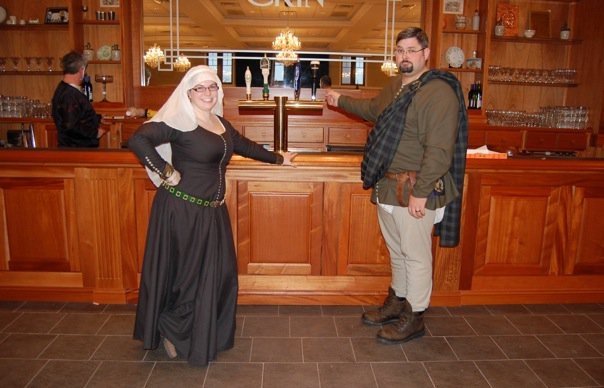
Woman and Man's "cotehardies" c. late 1300s
